Freebsd Laptop Support

  • Subscribe to our RSS feed.
  • Twitter
  • StumbleUpon
  • Reddit
  • Facebook
  • Digg

Friday, 10 February 2012

Linux Public Wi-Fi Compatible: Naia Terminal 2 Airport, Manila, Philippines

Posted on 18:41 by Unknown
Testing System
Linux Distribution: Ubuntu 11.10 Unity
Portable: Lenovo Ideapad Z360
*Login with Browser required, no username and password needed
*Speed is good via free Globe Wifi


Read More
Posted in Linux | No comments

CorelDRAW X5: Adding Barcodes and QR Codes to Business cards Part 2

Posted on 05:11 by Unknown
QR Codes and QR Code Services

Due to the popularity of QR Apps that can be installed on smartphones and iOS devices, QR codes are also becoming popular in business cards.  QR codes can contain web site information, text, VR cards, scripts, and other digital information.  They're great for providing instant access to web sites and company information. 

There are quite a few sites that provide a free online service for designing QR codes such as QR Code Generator and Kaywa.  However, in most cases, these free services provide limited flexibility in terms of scale and quality.  The QR codes are saved as PNG or even JPEG - formats that aren't recommended for large-scale printing or resizing.  They will work when printed as is.  However,  due to file limitations, QR codes in PNG or JPEG aren't the best for poster printing or business cards.  Resizing or blowing these bitmap images may result in unreadable QR codes.

CorelDRAW and Adobe Illustrator can easily convert these PNG QR codes to Vector images.  Vector images can easily be resized without any loss in fidelity or data.

To convert a PNG QR code in CorelDRAW X5 to Vector format:

1. Click File then Import.  Select the QR code PNG or JPEG file.  The QR code image will be inserted into the CorelDRAW document window.  In the screenshot below, the QR code's size is larger than the business card.  

2. Select the QR code image using the Pick Tool.  Launch Corel PowerTRACE by clicking opening the Bitmap menu, then Outline Trace and High Quality Image.  Alternately, click Trace Bitmap on the Property Bar and select Outline Trace then High Quality Image.
Bitmap menu.

Trace Bitmap on the Property Bar

3. In the PowerTRACE window, drag the Smoothing controls to 0.  Ensure that Corner smoothness is also 0 and that Detail  is at the maximum setting.

4. If needed, remove the background color by checking Remove background and using the eyedropper tool or checking Automatically choose color.  Click Ok.
5. The document window will display a vector version of the QR code.  If needed, delete the imported PNG image.  The QR code can now be scaled, moved, and resized without any loss in data.
The Object on the right is a Vector version of the QR code.


Tips for Printing and Testing QR codes:

1. When placing QR codes in business cards, test different sizes.  The appearance and complexity of a QR code is dependent on the amount of information "embedded" on it.  For instance, a web site produces a simple QR code while a a whole block of text (e.g. contact information, address, etc.) produces a more marked design.  Complex QR codes work best in large sizes while simple QR codes would work at a smaller size.
This QR code includes a complete set of contact details.

This QR code provides a web site link only.

2. Try different scanners and different devices.  Besides iOS devices like the iPhone, iPod Touch, and iPad, test the printed QR code on a Blackberry and Android phone.


3. Consider the paper and medium.  Business cards are printed on different types of paper of varying brightness, sheen, and color.  Print out a proof first.
4. Use different Scanner apps. The iTunes Store has quite a few free QR scanners such as i-nigma QR, Scan, and QR Code Scan. Some work better than others.  The i-nigma QR scanner, for instance, was able to read a poorly printed QR code that was cropped in the bottom while the two other apps failed.  QR code scan needed more light in order to interpret the QR code (i.e. the iPod Touch's camera failed under dim light).  Also, some apps boast the ability to scan a QR code from different angles. 


Read More
Posted in Techwriter | No comments

CorelDRAW X5: Adding Barcodes and QR Codes to Business Cards Part 1

Posted on 05:06 by Unknown
CorelDRAW has long been equipped with a Barcode Utility.  As far back as CorelDRAW 10, users can encode barcodes and insert them into any document.

To insert a standard numeric codebar in CorelDRAW X5:

1. Click Edit then Insert Barcode. 

2. In the Barcode wizard, select the Industry Standard Format from the list. 

3. Input the necessary numeric or alpha-numeric details.  For the Codabar format, up to 30 digits can be entered.
4. Click Next.
5. Input the Printer resolution, Magnification, and Bar height.  This is especially important if the final design (e.g. sticker, business card, price tag) will be resized or cropped by the printing service.  Barcodes should not be modified as much as possible.  Click Next.

6. Select a Font and a check on Make this bar code Human Readable if the barcode requires text translation.

7. Click Finish.
8. The barcode is inserted as an object in the document and can be positioned as needed.
Read More
Posted in Techwriter | No comments

Thursday, 9 February 2012

Travelling with Linux - A Survival Kit

Posted on 04:48 by Unknown
When travelling on a business trip or extended vacation, not many can survive with just an Android smartphone or iOS device like an iPad or iPod Touch. A Macbook, Macbook Air, or Windows 7 laptop is essential for productivity but not always enough. A Linux user, on the other hand, should have plenty of power on hand to keep a trip safe, productive, and ready for any emergencies.

The Survival Kit

1. Knoppix LiveUSB - Knoppix has excellent hardware support and applications that run perfectly even from a LiveUSB. Even an older Knoppix release includes VirtualBox for OS virtualization.Knoppix's small footprint on a USB allows plenty of available space for backing up files and transferring to other platforms, too.


2. Clonezilla LiveCD or LiveUSB - A resourceful Linux user always creates a clone of his dual-boot system or Linux setup on an external hard drive. Clonezilla, one of the best Linux distributions for backing up systems, is recommended for heavy duty backups for multiple systems. If a system fails, it's a snap to reimage a system via Clonezilla LiveCD or LiveUSB. 


3. External Hard drive - For a full reinstall on the go, an external hard drive with Linux ISOs or Clonezilla image is better than toting around DVD backups.

4. External DVDR drive - Although portable optical drives have gone out of fashion (even so far as being removed from laptops and popular machines like the Macbook Air and Mac Mini), it still has its use for the itinerant systems admin. Imaging, backing up, and fixing broken systems are easier with a LiveCD than on a LiveUSB. Moreover, the business road warrior still needs to burn the occasional DVDR for a client. 
K3B, KDE's DVDR burning software, works with any optical drive out there.
 
5. Netbook - Although the netbook has largely been replaced by tablets and ultrathin laptops such as the Macbook Air, there are many units still out there and manufacturers such as Samsung and Asus haven't given up on them. For the frugal but practical user, a Linux-powered netbook is indispensable for any task that requires writing or programming. A fast Linux distribution like ArchLinux, Puppy Linux, or Lubuntu on an Atom or AMD Vision equipped netbook can be a cheap multimedia companion.


Linux Distributions for the Itinerant Linux User

1. Linux Mint - Mint is loaded with a complete suite of Internet applications, office suite, and codecs ensuring a complete out-of-the-box mobile solution. Fedora, openSUSE, and Ubuntu are great with a full update and restricted applications, but if any of the above, Windows, or Mac OSX fails, a user might need a quick boot using a LiveCD like Mint.  Unlike some of the more advanced distributions out there, little configuration is needed to get wireless and everything else working.

2. Knoppix - Lightweight, small, and fast. See above.

3. Clonezilla - Imaging and backup solution. See above.


Read More
Posted in Linux | No comments

Tuesday, 7 February 2012

Linux Distribution Remorse: Ubuntu Unity 11.10

Posted on 04:56 by Unknown
I've been using Ubuntu Unity 11.10 for months now and I realize that I was spoilt by Ubuntu 10.10, which I had been running non-stop since its release.  11.10 can be impressive to new Linux users and does have its moments, but I have to admit I should have opted for openSUSE 12.1 KDE on my Lenovo Ideapad Z360.

Ubuntu has always been excellent with hardware compatibility and its support for an endless number of application makes it one of the more dependable Linux distributions to have on a network.  However, I am slowly realizing the productivity limits of Ubuntu Unity.  I agree that Unity is still superior to Gnome 3 in terms of productivity.  However, the uniqueness of Dash and the Launcher quickly wore off.  I found myself wishing for the efficiency of openSUSE's traditional Plasma interface with its "so-1990's" KDE Kickoff menu and "so-Vista" widgets.

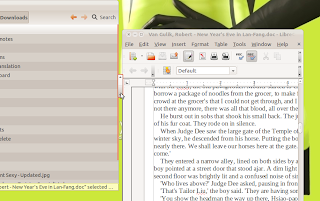
Surprisingly, the "Unity Scroll bar" doesn't affect LibreOffice.

There is no denying that Ubuntu is still as good as ever as an operating system - I still prefer it over Windows any day of the week.  However, more and more I'm beginning to realize the impact of Unity.  I stand by my initial review that Unity is an attractive interface, but I understand why the power user loathes it - I can imagine white-haired Linux gurus swearing and spitting at the monitor as they press ALT+F2.

Dash can be inconsistent

I get bored with desktop environments easily and welcome the change, but I've struggled to get used to the navigation and horribly intrusive Alt+F2 Dash.  When Adobe Reader for Linux, which worked fine in 10.10, openSUSE 11-12.1, and Fedora, displayed interface issues in Unity 11.10, I knew I had made a mistake.

Adobe Reader 9 does not function properly in Ubuntu Unity (works in openSUSE, Mandriva, and Fedora though)


The KDE and Gnome Application Compatibility Conundrum

Every Linux user is aware that not all KDE applications work perfectly in Gnome 2-3 and not all Gnome-based utility will install perfectly on KDE.  Common sense dictated that a user would install an application that would work best on the environment installed on their system.  Pybliography, for instance, works better in Gnome than in KDE.  KSnapshot, a screen-capture utility, is best on KDE. 

The aforementioned Pybliography failed to work properly in Unity.  Pybliography, a Gnome utility, had a slight performance issue in KDE but at least it worked - in Unity it was unusable.  All other applications worked after installation (e.g. Kompozer, Google Chrome, Shutter, etc.) but I couldn't help but wonder how many other applications would have issues with Unity.


The Desktop Environment is NOT the Linux Distribution

I haven't dismissed Ubuntu Unity 11.10.  It's easy to hate a distribution because of its interface.  At the moment, it doesn't take much effort to throw rocks at Ubuntu because of Unity.  The truth is users can opt for Kubuntu and Lubuntu, both well-loved Ubuntu spins.  I personally loved Lubuntu 11.10 and would install it on the Z360 (though I would be wasting the laptop's Nvidia 1GB VRAM and Core i3 hardware).

Getting used to the Menu appearing only when moused over is more difficult than that Office 2007 Ribbon everyone complained about.

In fact, there are many ways to configure Unity (MyUnity), to make it more similar to Gnome 2 and circumvent user interface issues.  I have great respect for the guys over at Canonical.  My minor hiccups with the Desktop switcher, Pybliography, and Adobe Reader were disappointing, but they weren't deal-breakers.  Perhaps Unity, like Xfce, just isn't for me.

My only regret is that I assumed Ubuntu Unity would be appropriate for a production laptop.  For that openSUSE 12.1, which is running perfectly on my underpowered netbook, should have been a better choice.
Read More
Posted in Linux | No comments

Monday, 6 February 2012

Torrents in Linux: Deluge, KTorrent and Transmission

Posted on 04:38 by Unknown
Even with popular torrent-client uTorrent available in Linux, most distributions package the popular Transmission client.  For KDE users, there's Deluge and the less popular KTorrent. Torrents are more dependent on broadband speed and seeders more than the client itself, but having a powerful torrent application allows a user to do more than be a reviled leecher.

uTorrent is available for Linux as a .tar.gz download


Transmission everywhere

Most Linux users will find Transmission preinstalled in their Gnome, Xfce, or LXDE distribution.  Transmission is a lightweight torrent application.  It's not fancy but has all the essentials for hardcore file-sharing.  For many years, Transmission was the torrent client of choice for most Linux users (particularly Ubuntu fans) and remains popular.


User observations:

1. Fast and lightweight
2. Triggers torrent and magnet links
3. Small and unobtrusive interface (doesn't require a maximized window to use unlike Deluge and KTorrent)
4. When the application is closed, Transmission exits completely.  Transmission doesn't "hide" or revert to the system tray.  This can be annoying for users who prefer to have their torrents running all the time - one mistaken click of the close button and Transmission closes.

KTorrent - underappreciated

For years, I uninstalled KTorrent along with many superfluous KDE apps that came with openSUSE.  KTorrent comes off as a cluttered application especially on a small netbook screen.  The utility looked even busier than older applications in Windows such as Bitcomet.  It also felt slower compared to Deluge (which I used for years).  Recently, however, I gave it a shot and realized it was no slower than Deluge and worked just fine. Despite the power of KTorrent and the number of setting a user can fiddle around with, KTorrent will run on default settings.  It works great on my openSUSE 12.1 machine to this day. 
KTorrent System Tray menu

User observations:

1.  Like most KDE applications, KTorrent has tons of settings to fiddle around with even when it's minimized to the System Tray.  Queues, Proxies, Ports, and MTUs can all be configured separately. 

Numerous plugins

2. The Group View can be somewhat confusing.  Downloads, uploads, "passive torrents" and "active torrents" are all sorted out in a file tree.  There is an option to close the view though.
Group View

3.  KTorrent certainly has more features than Transmission and Deluge.  A power user can import Torrents from other applications, run pre-written scripts, automate shutdown, access torrent Plug-ins, configure speed limits for each torrent running, and search torrent sites from within the interface.
Searching for torrents in KTorrent

Speed limit per torrent


Deluge of files

Deluge isn't as popular as Transmission and isn't found in most distributions.  However, it's one of my favorite Linux applications and I've used it for years on Ubuntu and openSUSE.  Unlike some KDE apps, Deluge works perfectly with Gnome 2 and installs very few KDE libraries.  Deluge is a bit more advanced than Transmission but isn't as comprehensive as KTorrent.

I've used Deluge to download most of the Linux LiveCD ISOs I've used in the last 5 years.

Torrent in Linux

Torrent fans aren't deprived in an Linux environment.  In fact, torrent downloaders are somewhat safer in a Linux environment due to Linux's impervious state against Windows malware.  Moreover, power users can erect safeguards that protect from attackers. 

I recommend Deluge for users of non-KDE and KDE Linux distributions that require more user involvement.  KTorrent is for power users running KDE.  Transmission, which comes with just about any distribution out there, is great for the casual torrent downloader.  
Read More
Posted in Linux | No comments

Saturday, 4 February 2012

Skrooge - A KMyMoney Finance Manager Alternative

Posted on 19:18 by Unknown
Skrooge is a KDE-based personal finance manager.  Having used KMyMoney for a few years now but having experienced screen size issues with KMyMoney on a netbook, I decided to try Skrooge as an alternative.

Skrooge: Minimalist Accounting 

1. Setting up the initial bank accounts is very straightforward in Skrooge and takes only a few seconds to get up and running.  Some might prefer KMyMoney's Setup Wizard however.

2. The Tracker functionality is particularly useful for sorting out expenditures.  It can be used to track specific types of expenditures, for instance those spent on vacation or for someone else.  It is a unique and invaluable feature to Skrooge.

3. The Categories are especially robust and a lot of work could be spent just deleting some of the items.  Skrooge does not have the preset account types of KMyMoney but the comprehensive list takes care of almost everything out there.

4. Tracking expenditures is intuitive and easy.  Budget and Payee screens are easy to read and configure.  Dashboard aside, Skrooge's overall interface is simpler and easier to use.
The Operations page is where users add to the Ledger.

KMyMoney and Skrooge have a similar interface when inputting an entry.

5. Another extremely useful feature is the Split table in Operations.  This excellent addition allows users to input one amount used for several purchases or expenditures.  


6.  The Report features of KMyMoney is much more powerful than Skrooge, but using the Reporting feature can be a lot of work.  Skrooge's Report Page maintains the same interface as the other Pages.  The minimalistic approach works for Skrooge proving that less is more.  


Additional Comments

1. Users are greeted with a very cluttered Dashboard (made worst on a small netbook screen).  There are several modules that can be added on the Dashboard such as Advice, Budget, 5 Most used categories, etc.  I can definitely see using some of these "widgets" but I felt that it appeared a bit too busy for my taste.  I disabled all of them to avoid any confusion on my first run. KMyMoney's Home Screen, in comparison, has a clean, customizable ledger view.
Dashboard on a new setup.
Dashboard after initial setup.

2. Skrooge imports KMyMoney files among other file types.  However, the transition isn't consistent - mixed currency accounts for instance isn't followed very accurately and older .kmy files cannot be imported (my 2011 .kmy file imported successfully but an older 2010 file didn't).

3. Skrooge can be installed on Unity and Gnome, but there are interface issues working on a non-KDE environment.  The Dashboard "widgets" are supposed to display Zoom and Move controls on hovering with the mouse, but they don't always appear on a Unity install.  Icons on the Pages panel also didn't show up properly.  KMyMoney didn't have the same interface problem on the same Ubuntu Unity machine.


KMyMoney, Gnucash, and Skrooge

Choosing between Skrooge and KMyMoney is a matter of taste more than anything else.  Skrooge and KMyMoney are both excellent personal finance managers.  For busy people, Skrooge is the better choice.  Managing finances shouldn't take too much time and as good as KMyMoney is, it has its quirks when managing the ledger.  KMyMoney, on the other hand, is best for large screens, non-KDE Linux distributions, and accounting for non-accountants.  It walks the line between minimalistic Skrooge and professional-level Gnucash.   

Skrooge is a brilliant KDE application and a competent finance manager for home users and definitely worth an install. 
Read More
Posted in Linux | No comments

Friday, 3 February 2012

Setting up KMyMoney - Accounting for the Rest of Us Part 2

Posted on 19:07 by Unknown
The selected account type determines the preset categories used for every expenditure.  Users can remove or delete categories as needed by clicking Categories on the left pane.  Right-clicking any of the listed categories allows the user to edit, create, and delete items on the list.

Logging an Expense (or Income)
Debits and credits are recorded on a ledger.  KMyMoney balances everything out using the standard approach to accounting.

To add an expense to the ledger:
1. Click Ledger on the left panel.
2. Select Withdrawal tab.  Any type of cost or expenditure is considered a withdrawal by KMyMoney because it reduces your overall wealth.

3. Click the New button.
4. On the Pay to field, type the Payee name.  The Payee is the recipient of the money - 711, Wal-Mart, Starbucks, your friend, etc.  KMyMoney will automatically remember previous payees, allowing users to eventually select repetitive expenditures like lunches at the cafeteria or electricity bills. 


5. On the Category field, select the appropriate category from the list.


6. On the Memo text box, type any additional description.
7. The Date is automatically filled out with today's date.  Click the Calendar button to change the date if the purchase or income occurred on a different date.  This is especially important when back tracking on previous dates.
8. Enter the Amount or press the Calculator button to pull up an integrated calculator for quick computations. 
9. Click Enter to add the entry to the ledger.

KMyMoney is an extremely powerful accounting application.  Investments can be tracked and Budgets can be set.  Besides the Ledger, casual users can use the Reports feature to track monthly, weekly, and overall cash flows.


Read More
Posted in Linux | No comments

Writing Procedures: Insert Inline Images for Unnamed Buttons Part 1

Posted on 04:17 by Unknown
The names of most parts of an interface can be identified via ToolTips, which display a visual element's name when the mouse is hovered over it.. Technical writers would often have to use the ToolTip when writing steps and procedures. However, some developers do not include this mouse over feature (e.g. Linux applications and open-source programs).

When a button or part of an interface does not have a name, it is often best to insert a small screen capture of the icon. In Windows 7, users can use the Snipping Tool or free software such as Lightscreen. Inserting these screen captures may be a bit laborious but assists users especially when the interface has numerous features and countless icons (e.g. Adobe Suite Products).


Inserting the screen captures or icons as inline images ensures that the image does not interrupt the flow of the text or instructions unlike large screenshots.

Word-processors programs such as Microsoft Word 2010, Lyx, LibreOffice Writer and design programs such as Adobe FrameMaker 10 and Adobe InDesign CS4 all insert inline images efficiently.

To insert inline images in Microsoft Word 2010:

1. Place the insertion point to where the image is to be inserted.
2. On the Insert tab, click Picture, and select the screen shot.

3. Word 2010 will automatically insert the picture as an inline image.
4. To edit image dimensions, borders, and position, click the Picture Tools tab.


To insert Inline images in Adobe FrameMaker 10:


1. Place the insertion point to where the image is to be inserted. 
2. On the File menu, click Import, then File. Select the screenshot or image. 
3. On the Imported Graphic Scaling window, select the dpi required for the image. For online tutorials or web-based documents, 72 dpi would suffice. 

4. FrameMaker will not automatically position the image in line with the text. To correct this, open the Special menu and click Anchored Frame. 
The screen cap is not aligned with the text.

The Anchored Frame panel changes the alignment and position.

5. On the Anchored Frame panel, select the At the Insertion Point on the Anchoring Position list. Click Edit frame. 
6. To adjust the alignment of the image with the text, edit the values found on the Distance Above Baseline. Negative values moves the image downwards in relation to the text.


**Alternately, inserted images can be aligned with text by selecting the frame (not the image inside the frame) and clicking ESC + M + P.

**Go to Writing Procedures: Insert Inline Images for Unnamed Buttons Part 2
Read More
Posted in Techwriter | No comments
Newer Posts Older Posts Home
Subscribe to: Posts (Atom)

Popular Posts

  • Drawing a Rounded Triangle in CorelDraw
    Category: Tech Writer If you need to draw a safety icon such as those found in user manuals or any icon which requires a rounde...
  • Linux on Film: The Amazing Spider-Man (2012) Part 1
    Ok, for dedicated fans of the latest Spider-Man movie (me included), Sony made use of this brilliant flick to advertise their Sony ...
  • Tech Flashback: The Lethal Weapon series 1987 - 1998 Part 3
    Category: Tech Today Continued from Tech Flashback: The Lethal Weapon series 1987 - 1998 Part 2 In this series of articles, we continue our ...
  • Linux on Film: Antitrust (2001)
    *All screencaps from Antitrust (2001 ) Long-time Linux users are familiar with Antitrust (2001), which was strongly adverti...
  • CorelDRAW X5: Adding Barcodes and QR Codes to Business cards Part 2
    QR Codes and QR Code Services Due to the popularity of QR Apps that can be installed on smartphones and iOS devices, QR codes are also becom...
  • CorelDraw Basics: Exporting to SVG for HTML5 web pages
    Category: Techwriter There are advantages to using SVG over the more popular PNG or JPEG when working with technical ...
  • What Applications Support PageMaker Files?
    Category: Tech Writer The discontinued Adobe PageMaker was a popular publishing application during a time when both comm...
  • Sony RAW (.ARW) support on openSUSE KDE
    Category: Linux Some advanced digital cameras and ILCs supports the RAW format, which many serious photographers prefer over JP...
  • Knoppix LiveUSB Basics: Bluetooth and Blueman Part 1
    Although Bluetooth has never been as reliable as a wired or RF connection, adding Bluetooth to an old machine is a simple way ...
  • Microsoft Product Placement in Arrow Season One Part 1
    Note: Unsolicited But Offered normally features Linux on film but in celebration of the ongoing season 2 of Arrow (w...

Categories

  • Linux
  • Linux - Mandriva
  • Linux - openSUSE
  • Tech Today
  • Techwriter
  • Travel Logs

Blog Archive

  • ►  2013 (229)
    • ►  November (19)
    • ►  October (21)
    • ►  September (20)
    • ►  August (23)
    • ►  July (23)
    • ►  June (21)
    • ►  May (24)
    • ►  April (22)
    • ►  March (19)
    • ►  February (16)
    • ►  January (21)
  • ▼  2012 (261)
    • ►  December (28)
    • ►  November (22)
    • ►  October (28)
    • ►  September (20)
    • ►  August (28)
    • ►  July (23)
    • ►  June (21)
    • ►  May (15)
    • ►  April (26)
    • ►  March (9)
    • ▼  February (11)
      • Linux Public Wi-Fi Compatible: Naia Terminal 2 Air...
      • CorelDRAW X5: Adding Barcodes and QR Codes to Busi...
      • CorelDRAW X5: Adding Barcodes and QR Codes to Busi...
      • Travelling with Linux - A Survival Kit
      • Linux Distribution Remorse: Ubuntu Unity 11.10
      • Torrents in Linux: Deluge, KTorrent and Transmission
      • Skrooge - A KMyMoney Finance Manager Alternative
      • Setting up KMyMoney - Accounting for the Rest of U...
      • Writing Procedures: Insert Inline Images for Unnam...
      • Writing Procedures: Insert Inline Images for Unnam...
      • Online Storage for Linux Users
    • ►  January (30)
  • ►  2011 (10)
    • ►  December (10)
Powered by Blogger.

About Me

Unknown
View my complete profile