Freebsd Laptop Support

  • Subscribe to our RSS feed.
  • Twitter
  • StumbleUpon
  • Reddit
  • Facebook
  • Digg

Monday, 30 January 2012

Setting up KMyMoney - Accounting for the Rest of Us Part 1

Posted on 18:23 by Unknown
Logging expenditures on a daily basis need not be complicated nor laborious.  Linux users have two popular accounting software in KMyMoney and Gnucash.  Advanced users may prefer Gnucash's extensive accounting and ledger sets, while home and small office users may prefer KMyMoney with excellent reporting features.

KMyMoney allows users to set and forget or be more active in managing their accounts.  Although there are options to pull data from the Internet (e.g. exchange rate, bank accounts, online quotes), KMyMoney works fine as a straightforward daily expenses tracker.  Once comfortable with the interface, users can make use of the more advanced transaction and forecast options.

Part 1: Set up a KMyMoney file

1. Click New on the Toolbar.

2. Fill out the Personal Data fields.  The data is only for record purposes and retained only in the file.


3.  Select the primary currency of the account.  Other currencies for specific accounts can be added later.

4.  In the Select Accounts section, fill out details for a checking account if available.  Again, users do not have to input the Account Number.  Inputting checking account details is extremely useful for tracking check usage.

5. Clear the checkbox for "I have a checking account that I want to manage with KMyMoney" if you do not have a checking account.
6. To track expenditures, users can make use of preset breakdowns of typical expenses.  KMyMoney calls them "Accounts."  Account Types can be selected based on countries and typical expenditures for individuals and familes.  For example, U.S. users may want Base - Details for a ledger that lists Charity, Clothing, Food, Health, and Housing as classifications for expenses.  

The Base-Blank Account Type in the U.S. simply classifies any money use as either Expense or Income.

7. KMyMoney files have a file extension of .kmy with a user's name as the filename.   It's a good idea to have have this file on a synced DropBox folder if you need to update the ledger from different computers running KmyMoney.  


Part 2: Create Institutions and Accounts

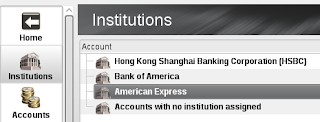
1. After creating the .kmy file, users need to create Institutions and Accounts.   Institutions are just the Banks you interact with or any other entity that handles your money. 
2. Click New Institutions on the Toolbar. 
3.  Fill out the Name field for the bank.  All other fields are optional.  Click Ok. 

4.  Once Institutions are created, users can create accounts under each Institution by clicking New Accounts.


5. Select the institution for the new account and click Next.   
6. Type in an Account Name to distinguish it from other accounts.  For example, American Express Nest-Egg or Education/Rainy Day Savings.  Select the account type, currency, opening date (if available) and opening balance.  Click Next. 

7. Accounts can have Asset or Liability as their Parent Account.  Click Next. 

8.  After reviewing the details and clicking Finish, the Account is now displayed in the Account Window.
Read More
Posted in Linux | No comments

Sunday, 29 January 2012

KDE 4.8 Announcements

Posted on 12:31 by Unknown
The KDE 4.8 announcements were released sometime last week.  As a regular user of openSUSE, I'm always eager to see what new developments and improvements have been made to the KDE desktop.  With Unity and Gnome 3 underwhelming the Linux community, KDE 4.x is the powerhouse interface many should turn or return to.  The KDE developers now have an opportunity to gain more users and impress.  It's sad, however, that Mandriva, one of the most respected Linux distributions running KDE, is suffering legal problems during a time that Linux is gaining ground from different fronts.

Wishlist for Upcoming KDE Releases:
  1. Faster boot time
  2. Faster performance
  3. Better power management
  4. Alternate Network Manager
  5. Newer wallpapers, colors, icons
  6. Including KMyMoney or Skrooge, KeepNote, Tellico, GCStar, Chromium as default applications.
KDE 4.3.5 is so yesterday.  Upgrade to 4.8!


Read More
Posted in Linux | No comments

Saturday, 28 January 2012

Working with Corners in CorelDRAW Designer

Posted on 22:05 by Unknown

Modifying corners in CorelDraw drawings are easy and simple even when working on more than two combined objects.

Before beginning, display the Grid in order to facilitate accurate positioning and editing.  Click View then Grid or press F10.

In this example, three rounded squares will be welded together as depicted on the voltage adapter below.


Step 1: Modify the corners of Square Objects

1. Select the Square object using the Pick Tool. 
2. On the Property Bar, select Rounded, Chamfered, or Scalloped Corner. 
3. Set the Corner Radius.  Use the Edit Corners Together padlock to set the same corner radius for all corners.


Step 2: Position the Square objects and weld them together

1. Fill all the three squares with any color using the Palette and change the thickness of the Outline using the Outline Pen so it is more visible. 
2. Align the squares to form a pyramid.  Use the grid to ensure consistency. 
3. Click Window then Shaping to display the Shaping Dock. 
4. In the Shaping Dock, select Weld from the list. 
5. Select the top square using the Pick Tool.  Click the Indicate Target button on the Shaping Dock.  The two objects are now welded together while retaining the rounded corners.


Step 3: Modify the curves to create reverse corner

1. Zoom in to the corner where the two squares had been welded. 
2. Select the Shape Tool on the Toolbox. 
3. Using the Shape Tool create two nodes equidistant from the corner.  Right-click and then click Add Node.  Alternately, use the Add Node button on the Property Bar. 


4. Select the single node on the corner.  Right-click and Delete Node.  Alternately, use the Delete Node button on the Property Bar.  With the corner node deleted, there is now a straight line running between the two nodes created in Step 3. 


4. Using the Shape Tool, right-click on the line between the two nodes creates in Step 3. Click Convert to Curve. 


5. Drag the curve in line with the top square.  Use the control arrows of the two nodes to modify the smoothness of the curve as needed.


The corners of the top square now flow into the lower-left square.

Read More
Posted in Techwriter | No comments

Friday, 27 January 2012

Configuring Send Reference to Lyx (Lyxpipe) in KBibTex

Posted on 18:29 by Unknown
KBibTex is an excellent bibliography application that offers extensive configuration and export capabilities.  KBibTex can be used to add citations directly into Lyx.  However, unlike Pybliography, users may have to configure this feature first. 

An error message will be displayed if the Lyxpipe isn't configured first.


Configure Lyxpipe in KBibTex:

1. Launch both Lyx and KBibTex.
2. In KBibTex, click Settings and Configure KBibTex.
Configure KBibTeX.

3. On the left panel, click Saving and Exporting. 
Lyx Server Pipe

4. On the Lyx Server Pipe field, type the path of the Lyx Server Pipe.  In most cases, the path can be found for the server pipe is:

~/.lyx/lyxpipe

When navigating for the Lyx folder, ensure that Dolphin or Gnome is displaying Hidden Files. 
Show hidden files and folders.
Use lyxpipe.in

There are two files for the lyxpipe.  Select

lyxpipe.in

5. Click Apply then Ok.  

To insert a Citation directly into a Lyx Document using KBibTex:

1. In Lyx, ensure that a BibTex generated bibliography has been inserted at the end of the Lyx document (or wherever it is needed). 
Insert the BibTeX Generated Bibliography first.

2. Place the insertion point where the citation is to be added.
3. In KBibTex, click Element then Send Reference to Lyx.  The reference key will be added to the Lyx document.
Send Reference to Lyx.

Lyx document exported to PDF with citations and bibliography.

Read More
Posted in Techwriter | No comments

Thursday, 26 January 2012

Creating and Customizing New Entries and Fields using Pybliographic

Posted on 18:23 by Unknown
Each entry type in Pybliographic is linked to a number of fields.  For example, author, translator, etc.  Users can create their own entry type specific to their needs.  For example, magazines or music tablatures or modify the entries to suit their purpose.

To create a New Entry Type and associate data entry fields to the Entry Type:

1. Click Settings then Fields.

2. Switch to the Entries tab.  In the Entry type box, type a new entry type (e.g. General Periodical).

3. Click Add.
4. Switch to the Association tab. 

5. Select fields from the Available list that are required for the new entry type.  For example, a General Periodical would need fields for author, publisher, date, etc. For each selected field, click Add.  The field will appear on the Associated box. 
6. Place a checkmark on fields that are considered mandatory.  An unchecked field is considered optional.

To create unique data entry fields:
1. Users may want to add a data entry field that is not listed in the Available box.  Click the Fields tab and type a data entry field name on the Name box.

2. On the Type box, select either Text, Long Text, Date, Authors, Reference, or URL.  The Type determines how the field accepts entries. 
Read More
Posted in Techwriter | No comments

Using Pybliographic and Lyx for Citations and Bibliography Part 2

Posted on 04:44 by Unknown
Inserting the Generated Bibliography into Lyx

1. Open a new document in Lyx.  Ensure that Pybliographic is also running with the appropriate bibliography file open.  Without the two applications simultaneously running, citations cannot be inserted into the Lyx document. 
2. Before inserting citations, the writer should insert the bibliography first.  In most cases, the list is at the end of a section, chapter, or article.  In the Lyx document window, place the insertion point to where the bibliography will be displayed.   
3. Click Insert, List/TOC then click Bibtex Bibliography.

4. In the Database window, click Add.  Ignore the list of sample bibliographies listed.  Click Browse and navigate to the .bib file created from Pybliographic. 

5. Click Add.  The database should now display the bibliography filename from Pybliographic. 
6. The Style box lists numerous bibliography styles included with Lyx.  Select an appropriate Style for the document.  Otherwise, use the default Style plain. 
7. After clicking Ok, the Lyx document window will now display highlighted text indicating the BibTeX Generated Bibliography.
The generated bibliography is displayed formatted when the Lyx file is exported to PDF, however, in the Lyx Document window it only displays "BibTeX Generated Bibliography."


Inserting Citations into Lyx

1. With the generated bibliography now inserted into the document, writers can now add as many citations as they need.   
2. Place the insertion point to where a specific citation is required.  Click Insert then Citation. 

3. A list of Available Citations will be displayed as Keys defined during the creation of the bibliography.  Writers can also search for specific citations in the list. 

4. Select a citation from the list and click the Add button. 
5. If more than one book is cited, use the Up and Down buttons to arrange the sequence of citations.  
6. Writers can also change the Citation style or add text before or after the citation.  Click Apply or Ok.
The Lyx Document window will only display the Key once a citation is inserted.  Mousingg over displays the citation details.


Inserting Citations directly from Pybliographic

1. A writer may have difficulty remembering the Keys for each book.  Pybliographic can insert Citations directly into a Lyx document via Lyx Pipe.
2. Ensure that both Lyx and Pybliographic are open with the document and file open.
3. In the Lyx document window, place the insertion point to where the Citation should appear.
4. In Pybliographic, select an entry from the list.  Click Cite then Cite or use the Cite button from the control bar.
To use Pybliographic to add citations via Lyx Pipe, both Lyx and Pybliographic need to be running.
Read More
Posted in Techwriter | No comments

Wednesday, 25 January 2012

Using Pybliographic and Lyx for Citations and Bibliography Part 1

Posted on 04:14 by Unknown
Lyx is an excellent and professional WYSIWYM word-processing software and in conjunction with open-source bibiliography software is invaluable for the serious writer.  There are many utilities for handling bibliography that can be used with Lyx.  The Lyx Wiki provides a list of platform-independent, Gnome, and KDE programs.

In this article, the Gnome-based Pybliographic is used with a standard openSUSE installation of Lyx in a KDE environment.  Although Pybliographic was designed for Gnome rather than KDE4, it works fine in openSUSE 12.1 though there are noticeable brief slow moments when opening programs such as Gwenview. 

Creating Entries in Pybliographic

1. Click the Add New Entry on the control panel of Pybliographic.
The Plus sign opens the add new entry box.
2. Before filling out any of the fields, select the appropriate source type from the Entry Type list.  The fields displayed are determined based on the entry type selected.  For example, the Book Entry Type has fields for Author, Editor, Publisher, etc.
The Entry Type and Key should be filled out first.
3. Enter a Key to identify the bibliographic entry from other entries (ie. a shortcut).  Pybliographic automates the creation of Keys by using the author's initials and the year.  For example, the entry for "Kafka on the Shore" by Haruki Murakami is assigned an HM94 key (the book was published in 1994). 
4. Fill out the Optional and Notes fields if necessary.  
5. New fields can be added by typing in the box provided and clicking on Create Field.  An extra tab labelled Extra will appear displaying any user-added fields.

6. Click Apply.
7. The bibliography entry will be listed on the top panel while details will be displayed in the bottom panel. 
Entries can be edited or deleted by right-clicking on the list.

8. Save the bibliography list by clicking File then Save As.  Select BibTeX as Bibliography type and do not forget to add the file extension .bib as the application does not add this by default.  Without the .bib extension it can, however, be opened using a text editor - though Pybliographic doesn't recognize it!
Do not forget to add the .bib file extension.


Exporting the Bibliographic Entries to HTML, Text, or Latex

1. Click Cite then Format.

2. Pybliographic provides several bibliography styles.  Click Browse and select from the list.  As a reference, take a look at the list below.
Bibliography Style

Entry Sequence

Sample

apa4e.xml

Author alphabetical[KE04]
Kay Ethier. (2004). XML
and Framemaker
. New
York, NY 10013: Apress.
Alpha.xml

Author alphabetical[KE04]
Kay Ethier. XML and
Framemaker
, New York, NY 10013, 2004. Apress, New York, NY 10013,
2004.
abbrev

Author alphabetical

[KE04]
Kay Ethier. XML and
Framemaker
, New York, NY 10013, 2004. Apress, New York, NY 10013,
2004.
abbrevau

Author alphabetical[Kay,
2004]
Kay
Ethier. XML and
Framemaker
, New York, NY 10013, 2004. Apress, New York, NY 10013,
2004.
abbrvbib

Author alphabetical[KE04]
Kay Ethier. XML and
Framemaker
, New York, NY 10013, 2004. Apress, New York, NY 10013,
2004.
abbrvnum

As-is

[5]
Kay Ethier. XML and
Framemaker
, New York, NY 10013, 2004. Apress, New York, NY 10013,
2004.
3. From the Format list, select HTML, Latex, or any of the text-based outputs.
4. Enter the output file name and location.
Besides exporting to text and HTML, the .bib file can be edited by any text-editing application such as Gedit or Kwrite.

Bibliographies exported to HTML can be used in web sites.
Read More
Posted in Techwriter | No comments

Monday, 23 January 2012

Quickfix: Faking White Background when Displaying Photos of Devices

Posted on 12:01 by Unknown
When writing about devices and hardware, technical writers will frequently have to post, copy, attach, insert, or Place (Adobe) a photo of the device.  In most cases, the layout or graphics artists will provide the photo, but the independent writer can easily "fake" the professional-looking white background by taking a photo of the hardware himself.
1.  Place the object or hardware on a clean, white sheet of A4 or Letter paper.  The sheet needs to be thick enough and bright enough to accomodate any Flash settings of the camera.  
Professionally-taken photos of devices are normally edited using Masks and Layers to provide a clean, white background.  This can be created artificially using any basic photo-editing software.
 2.  Arrange the device or hardware on the sheet of paper in such a way that when the photo is taken, only the white parts of the paper are seen as background.  Alternately, focus on a particular angle taking note of areas that can be cropped later on.  Use the digital camera's white balance feature to increase the whitness of the paper area further.
A photo of this Flash drive was taken on a sheet of office paper.  The shadows and dull white can be edited using basic software later on.
3. Once copied to the hard drive, open the image in a photo-editing software such as open-source Gimp and increase the white Levels to make the white areas even brighter.  In Gimp, the Levels feature can be found on the Colors Menu. Further editing, such as Sharpness and Color  Saturation, can be done afterwards.
Levels increases the white and dark areas of an image.


Read More
Posted in Techwriter | No comments
Newer Posts Older Posts Home
Subscribe to: Posts (Atom)

Popular Posts

  • Drawing a Rounded Triangle in CorelDraw
    Category: Tech Writer If you need to draw a safety icon such as those found in user manuals or any icon which requires a rounde...
  • Linux on Film: The Amazing Spider-Man (2012) Part 1
    Ok, for dedicated fans of the latest Spider-Man movie (me included), Sony made use of this brilliant flick to advertise their Sony ...
  • Tech Flashback: The Lethal Weapon series 1987 - 1998 Part 3
    Category: Tech Today Continued from Tech Flashback: The Lethal Weapon series 1987 - 1998 Part 2 In this series of articles, we continue our ...
  • CorelDRAW X5: Adding Barcodes and QR Codes to Business cards Part 2
    QR Codes and QR Code Services Due to the popularity of QR Apps that can be installed on smartphones and iOS devices, QR codes are also becom...
  • Linux on Film: Antitrust (2001)
    *All screencaps from Antitrust (2001 ) Long-time Linux users are familiar with Antitrust (2001), which was strongly adverti...
  • CorelDraw Basics: Exporting to SVG for HTML5 web pages
    Category: Techwriter There are advantages to using SVG over the more popular PNG or JPEG when working with technical ...
  • Sony RAW (.ARW) support on openSUSE KDE
    Category: Linux Some advanced digital cameras and ILCs supports the RAW format, which many serious photographers prefer over JP...
  • Knoppix LiveUSB Basics: Bluetooth and Blueman Part 1
    Although Bluetooth has never been as reliable as a wired or RF connection, adding Bluetooth to an old machine is a simple way ...
  • Linux on Film: The Amazing Spider-Man (2012) Part 2
    Piezoelectric technology and microcontroller From a plot perspective, Peter probably made use of existing equipment like th...
  • Microsoft Product Placement in Arrow Season One Part 1
    Note: Unsolicited But Offered normally features Linux on film but in celebration of the ongoing season 2 of Arrow (w...

Categories

  • Linux
  • Linux - Mandriva
  • Linux - openSUSE
  • Tech Today
  • Techwriter
  • Travel Logs

Blog Archive

  • ►  2013 (229)
    • ►  November (19)
    • ►  October (21)
    • ►  September (20)
    • ►  August (23)
    • ►  July (23)
    • ►  June (21)
    • ►  May (24)
    • ►  April (22)
    • ►  March (19)
    • ►  February (16)
    • ►  January (21)
  • ▼  2012 (261)
    • ►  December (28)
    • ►  November (22)
    • ►  October (28)
    • ►  September (20)
    • ►  August (28)
    • ►  July (23)
    • ►  June (21)
    • ►  May (15)
    • ►  April (26)
    • ►  March (9)
    • ►  February (11)
    • ▼  January (30)
      • Setting up KMyMoney - Accounting for the Rest of U...
      • KDE 4.8 Announcements
      • Working with Corners in CorelDRAW Designer
      • Configuring Send Reference to Lyx (Lyxpipe) in KBi...
      • Creating and Customizing New Entries and Fields us...
      • Using Pybliographic and Lyx for Citations and Bibl...
      • Using Pybliographic and Lyx for Citations and Bibl...
      • Quickfix: Faking White Background when Displaying ...
      • Additional Notes on Razor-qt on openSUSE 12.1: Tou...
      • Quickfix: GCStar Plugins error
      • Razor-qt Desktop Review on openSUSE 12.1: Fast and...
      • Razor-qt Desktop Review on openSUSE 12.1: Fast and...
      • openSUSE 12.1: Install super-fast Razor-QT Lightwe...
      • Quickfix: Recovering files from a broken Fedora in...
      • Recommended: The Designer's Desktop Manual by Jaso...
      • openSUSE 12.1: Getting Bluetooth working using Blu...
      • Adventures with running Xfce along with Fedora 15...
      • Adventures with running Xfce along with Fedora 15...
      • Three Months with Fedora 15 on an Asus 1000H EEEPC
      • Mozilla Firefox: File does not appear in File Mana...
      • Hotmail errors and slow performance
      • Quickfix: Skype first run on openSUSE 12.1
      • opensuse 12.1 Essentials: DropBox
      • Resolving Touchpad issues in openSUSE 12.1 with th...
      • Review: Speedo Aquabeat MP3 Player - Only for the ...
      • Quickfix: Fedora 15 Bluetooth issue (in Asus EEEPC...
      • Xfce vs. LXDE vs. Gnome(2,3) vs. KDE4 vs. Unity Su...
      • FrameMaker 10 Crash Course: Working with Imported ...
      • Xfce vs. LXDE vs. Gnome(2,3) vs. KDE4 vs. Unity Pa...
      • Exploring the Activity Manager in openSUSE 12.1 Pa...
  • ►  2011 (10)
    • ►  December (10)
Powered by Blogger.

About Me

Unknown
View my complete profile