KMyMoney allows users to set and forget or be more active in managing their accounts. Although there are options to pull data from the Internet (e.g. exchange rate, bank accounts, online quotes), KMyMoney works fine as a straightforward daily expenses tracker. Once comfortable with the interface, users can make use of the more advanced transaction and forecast options.
Part 1: Set up a KMyMoney file
1. Click New on the Toolbar.
2. Fill out the Personal Data fields. The data is only for record purposes and retained only in the file.
3. Select the primary currency of the account. Other currencies for specific accounts can be added later.
4. In the Select Accounts section, fill out details for a checking account if available. Again, users do not have to input the Account Number. Inputting checking account details is extremely useful for tracking check usage.
5. Clear the checkbox for "I have a checking account that I want to manage with KMyMoney" if you do not have a checking account.
6. To track expenditures, users can make use of preset breakdowns of typical expenses. KMyMoney calls them "Accounts." Account Types can be selected based on countries and typical expenditures for individuals and familes. For example, U.S. users may want Base - Details for a ledger that lists Charity, Clothing, Food, Health, and Housing as classifications for expenses.
The Base-Blank Account Type in the U.S. simply classifies any money use as either Expense or Income.
7. KMyMoney files have a file extension of .kmy with a user's name as the filename. It's a good idea to have have this file on a synced DropBox folder if you need to update the ledger from different computers running KmyMoney.
Part 2: Create Institutions and Accounts
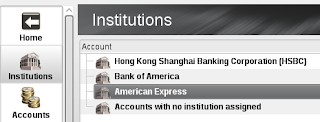
1. After creating the .kmy file, users need to create Institutions and Accounts. Institutions are just the Banks you interact with or any other entity that handles your money.
2. Click New Institutions on the Toolbar.
3. Fill out the Name field for the bank. All other fields are optional. Click Ok.
4. Once Institutions are created, users can create accounts under each Institution by clicking New Accounts.
5. Select the institution for the new account and click Next.
6. Type in an Account Name to distinguish it from other accounts. For example, American Express Nest-Egg or Education/Rainy Day Savings. Select the account type, currency, opening date (if available) and opening balance. Click Next.
7. Accounts can have Asset or Liability as their Parent Account. Click Next.
8. After reviewing the details and clicking Finish, the Account is now displayed in the Account Window.


0 comments:
Post a Comment