When writing technical/marketing documents for consumer devices, electronics, and toys, you often have to give emphasis to parts or sections in a product not just for informative reasons, but to draw interest to your user/buyer. Doing this in CorelDraw is exceptionally easy using Corel's PowerClip feature. This approach can also be used for sci-fi illustrations and even comic books for a more visual effect.
In this example, we'll be creating a simple zoom view for a power adapter using CorelDraw X5:
1. Using the Pick Tool, select the main product illustration. It is recommended that the product is grouped as one object (Select all objects and click CTRL+G).
2. Resize the duplicate proportionally by selecting the drawing using the Pick Tool, holding down the SHIFT key, and dragging one of the object handles. As an alternative, you can resize the original drawing instead.
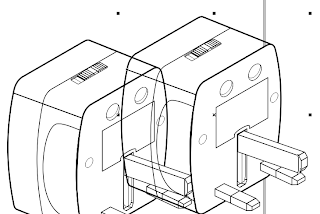
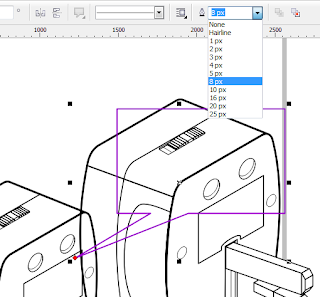
3. Draw a simple object such as a circle or use the Callout Tool to create a container for your "zoom" drawing. To facilitate this tutorial, we'll use a basic callout drawing. Left-click a color swatch to fill the callout object with color and right-click to provide a color for the outline. More importantly, increase the outline thickness using the toolbar. Place the callout object over the drawing and resize as needed.
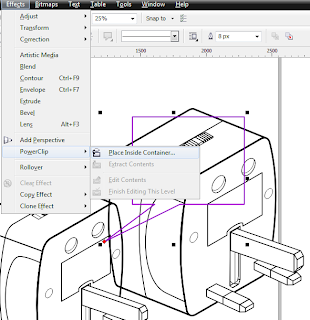
4. Using the Pick Tool, select the duplicate. Click Effects, PowerClip, then Place Inside Container. The mouse pointer will become a big black arrow. Use the arrow to click on the callout drawing. PowerClip will place the duplicate "inside" the drawing.
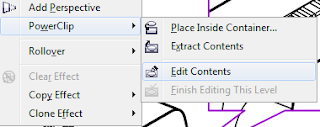
5. If you need to adjust the position of the drawing inside the callout object, click Effects then PowerClip. Click Edit Contents. Move the duplicate or edit as needed. Click Effects, PowerClip, then Finish Editing This Clip when you're satisfied. You can also access the PowerClip options using the Right-click context menu.
5. Customized drawings can also be used as containers. In the example below, a simple ellipse plus a triangle result in a more streamlined "zoom" view.
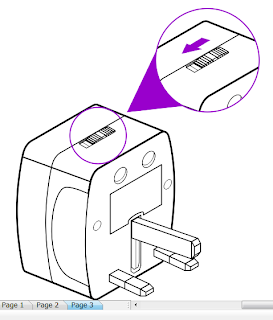
Using the same principle, you can create zoom views and even cross-sections of more complex 2D drawings. Although most CAD users deride 2D node-editing vector software such as CorelDraw and even Adobe Illustrator for technical illustrations, working with expensive and 3D software such as SolidWorks and AutoCAD are overkill for simple drawings and documents. Moreover, the learning curve is pretty steep and can be time-consuming for just one project. If the eventual output is to digital publishing such as HTML, EPUB, PDF, or even print, using vector images and node-editing applications such as CorelDraw or open-source Inkscape is a time-saver.


0 comments:
Post a Comment