Continued from CorelDraw Basics: Drawing an App Advertisement in Perspective Part 1
Adding the App screenshot
To add a screenshot of an app or any piece of software to the tablet illustration, it is best to use a high-resolution image. A vector illustration is preferable to a bitmap screenshot, but a clear image still works in most cases.
1. Click File then Import... and select the image to be added to the vector tablet. This example uses a PNG screenshot of the SkyDrive user interface taken using Lightscreen.
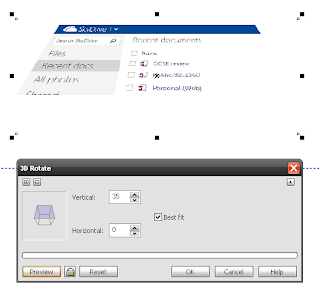
2. Select the screenshot using the Pick Tool. On the Bitmaps menu, click 3D Effects then 3D Rotate...

3. In the 3D Rotate window, increase the Vertical (and Horizontal) values. Click the Preview button to view changes.
4. If needed, position the screenshot over the tablet drawing to check if the angle is appropriate.
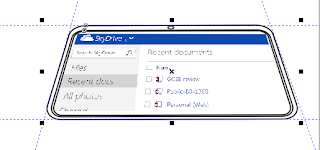
5. Since using the 3D Rotate effect on a bitmap would add "white space" to provide depth, place the screenshot "inside" the display or a separate vector object using the PowerClip tool.
Click Effects then PowerClip. Click Place Inside Container... and use the arrow to point to the tablet's "display" or a closed object. In the screenshot below, the Pen tool is used to create a closed object matching the dimensions of the rotated bitmap. The Outline Tool is then used to make the vector object drawing "disappear".

6. Reposition the rotated bitmap inside the tablet drawing.


0 comments:
Post a Comment